Have an Android phone you love? Bring it! Switching to Cricket is easy whether you have a Samsung, Motorola, Google or any other Android phone. Just follow these simple steps.
What are the device requirements?
- Your Android phone must be unlocked. Learn more.
- If your phone is locked, call the wireless carrier that sold you the phone and request an unlock code.
- Your Android phone must be compatible with Cricket’s network. Check compatibility.
- Your Android phone must have a SIM card slot or be eSIM-capable.
- Some Android devices include an embedded SIM (eSIM). This makes the activation process quicker and more secure.
- If your device is not eSIM-capable, don't worry. Just follow the steps below to insert your physical SIM card and install the settings needed.
How do I install the Cricket settings on my Android phone?
There are two ways to install the Cricket settings on your Android phone: Automatic Configuration and Manual Configuration.
Automatic Configuration
Shortly after you insert the Cricket SIM card, you should see a notification for installing the Cricket settings. Follow these instructions.
Please note: Screens may vary slightly for different phone brands.
1. After activation you will see 2 messages in your messaging folder. Tap Messages.
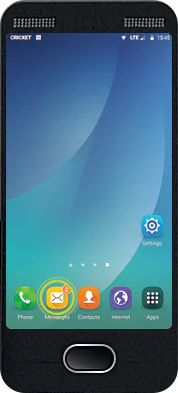
1. After activation you will see 2 messages in your messaging folder. Tap Messages.
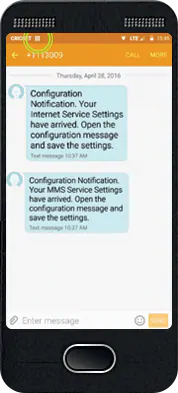
2. These two messages will confirm that your Internet Service and MMS Service settings have arrived.
Note: Some phones will give have an option to “Install” directly within these messages. If not, proceed to Step 3.
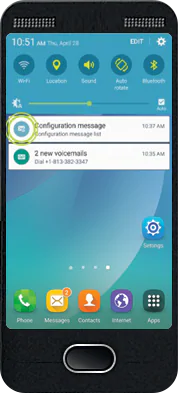
3. Look for the envelope icon in the Notification Tray. Pull down on the Notification Tray and Tap Configuration message.
Note: If you do not see these configuration messages, skip down to Manual Configuration.
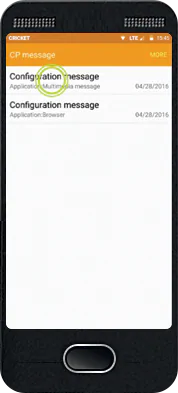
4. Tap on each Configuration message to see setting details.
5. Tap Install.
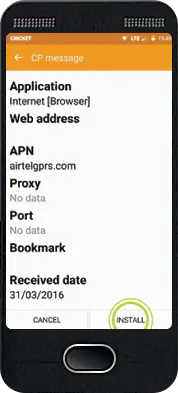
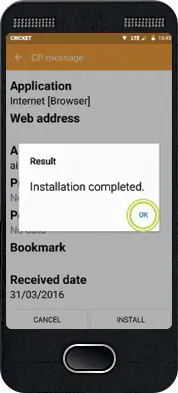
6. Tap OK. After you've installed both your Internet Services and MMS settings, you're good to go!
Manual Configuration
On some devices, you will need to update the settings manually. Don't worry, that's easy! We'll walk you through the steps.
Please note: screens may vary slightly for different phone brands.
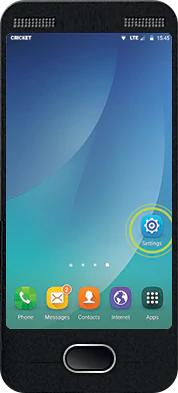
1. Tap the Settings icon (on the homescreen or in Apps).
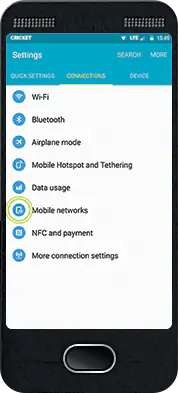
2. Tap Mobile Networks.
3. Tap Access Point Names.
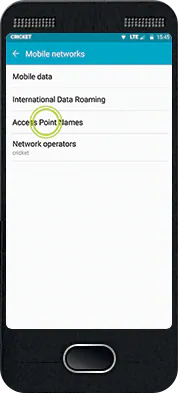
4. Tap Internet to edit the current settings for that Access Point.
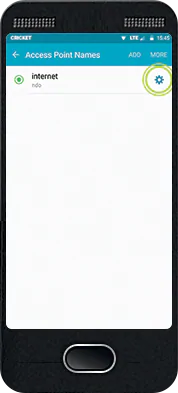
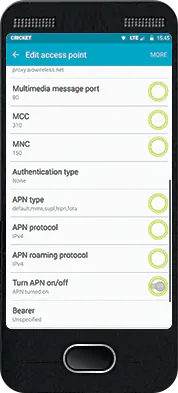
5. Edit the settings to match the settings listed below by tapping on each setting you wish to change. Don’t worry about extra settings not listed.
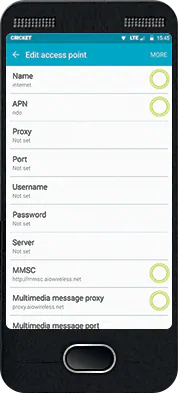
- Name: Internet
- APN: Endo
- MMSC: http://mmsc.aiowireless.net
- MMS Proxy: proxy.aiowireless.net
- Multimedia Message Port: 80
- MCC: 310
- MNC: 150
- APN type: default,mms,fota,hipri,supl
- APN protocol: IPv4
- APN roaming protocol: IPv4
- Turn APN on/off: ON
When those settings are complete, you're good to go.
Enjoy your data and picture and video messaging!
